Showing posts with label recycling. Show all posts

25 May 2015

Killing frost

The good news is that the 20 greenhouse tomatoes are still going strong


It's a different story out in the barnyard, however. The weather took an unpleasant dip below freezing on Saturday May 23rd, leaving all the tomato plants looking like this at 7.00am:


And by the time the sun had warmed them up, they all looked like this:


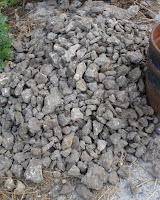
This, dear reader, is a dying tomato. Today, all that's left of it is a sad little pile of brown.


I still had a few of my excess plants left, which I've been selling from my mini farm stand at the front of the house. In fact, a woman bought 30 dollars-worth on Saturday afternoon. She's a regular customer, so I couldn't say no, but my heart was breaking a little bit as I saw her leave with 70% of my remaining plants. This left me with just eight to replace the 40-odd I had lost.

I have sown some more, in a spirit of optimism, and have also pinched out side-shoots of some of the greenhouse plants, in the hope that they will root and be useful to fill some of the gaps.


I also discovered a couple of volunteer tomato seedlings growing in the pepper bed, so I have recruited them to the cause as well.


Then I remembered noticing some other stray tomatoes in the front garden: they must have grown from the worm compost I spread there in the spring. Sure enough, there was a respectable crop of baby tomato plants growing in among the flowers there. I dug them up and potted them into a seed tray. At this rate I will soon be over-run with tomato plants again. ;-)


Of course I have no idea what variety these little plants are, but they will all be from last year's fruit, so should all be heirloom types. I can't think of a better argument for growing heirloom plants and for home composting than this!

The frost was forecast - in a rather last-minute way - but the night before was very windy, so putting any sort of protection in place wasn't easy. I managed to cover up the corn and squash plants with plastic, but even with that layer, most of those died, too. They were only sown a week or two ago, so won't be as difficult to replace as the tomato plants.

The brassica plants survived the frost, but even they have suffered some damage - I think the temperature was more like -2°C/28°F than the 0°C/32°F that was (eventually) forecast. Ah well, lesson learned: wait until June to be safe.

18 May 2014

Greens galore

The greenhouse is producing lettuce and herbs like mad at the moment. Some are ones I sowed this year, others are volunteer seedlings from last year's gone-to-seed herbs and salad crops, like the cilantro/coriander in this clump.


One bed is nearly full of volunteer bok choi - too much to eat and it bolts to seed very quickly. But the chickens seem to love it, so it's not being wasted!


We had hours of heavy rain on Friday which has left the lower vegetable garden too wet to plant anything into, and to add insult to injury we woke up this morning to a very light frost.


I think the squash and pumpkin plants which were already outside have weathered it. As a vote of confidence in their future I sowed a lot of radish seeds around that bed this morning. Apparently radish is a good deterrent against squash bugs, which have been a problem in the past. Tonight is supposed to be cool, too, but after that the temperatures should be much warmer at night. With any luck the soil in the lower vegetable garden will start to dry out a bit. I hope by next weekend most of the tender crops will be safely planted out.

09 May 2013

Crossing the line

The line I'm thinking of is the one that divides behaviour that is considered quite normal, and behaviour which is viewed as eccentric. The location of the line varies from person to person, of course, and I'm fairly sure that a lot of things I consider perfectly reasonable activities would definitely be on the other side of the eccentricity line for other people. Growing my own food, raising chickens, baking all my own bread, making granola, refusing to buy processed food - that sort of thing. But I crossed my own version of that line in recent months when I started making my own yog(h)urt. I don't know why that seems more eccentric than baking bread (and the two activities are now closely linked, as I'll explain in a minute), but it does. Somehow making yoghurt seems such a 1970s thing to do.

But it's so easy that I've become completely addicted to the process and always have a batch of home-made yoghurt in the fridge. I've delayed blogging about it because of my reservations about it being an odd sort of thing to do.

The initial stimulus for the activity involves another confession (you can see why I delayed writing this post). I'm really bad at throwing out man-made containers like jam jars and yoghurt pots. I have cupboards full of them and they do come in very handy at times, but I really don't need any more. When I read Mimi Spencer's book 101 Things To Do Before You Diet back in February and she explained how simple it was, I was inspired to give it a go. And now I've been re-using the same yoghurt pot for the last three months. Win!

I started out by ordering a sachet of yoghurt culture online. You can just buy a jar of plain active yoghurt as your starter culture and don't need to do this, but I didn't have any to hand at the time. Then you heat some milk to boiling point (I use 2% fat milk) and let it cool down to about 45°C/115°F (if you don't have a thermometer, I read somewhere that at this temperature you should be able to keep your finger in the milk for 20 seconds). Stir three tablespoons of the yoghurt into the warm milk and then pour it into a vacuum flask (at the start of the process I just fill the flask with milk to measure the quantity - hence the lack of precision in these instructions! [I've now measured the quantity and my flask holds a litre/quart of milk]). After a couple of hours the milk will have curdled and you can strain the yoghurt to remove the liquid whey and thicken it up. I use a sieve lined with a coffee filter paper or kitchen paper for this.


Here's the view from the side. You can see the whey underneath the sieve.


I use the whey as part of the liquid I add to my bread - which means that a yoghurt-making day is usually also a bread-making day. But I've also read that tomato plants really like the calcium in whey, so I might use it for that in the summer.

Tonight I'm planning to use the yoghurt to make naan bread and raita to accompany the curry we're having for supper. My stomach is already growling at the thought.

So, do you do anything that you feel crosses your personal eccentricity line? Or is it just me that worries about these things?

14 April 2013

Preparing for Spring, eating like Winter

Friday's ice storm didn't do too much damage here, although the trees were coated with a fairly thick layer of ice for several hours.

I'm wanting to transfer my tomato seedlings to the greenhouse, but the temperature isn't high enough yet. I did mobilise the children to start the process today. We liberated an old table and a cable spool from the big barn and carried/rolled them down to the greenhouse to act as potting tables. Then we spent twenty minutes or so laying out pots and filling them with potting mix. So the pots are now ready for the tomatoes, if the weather should ever decide to co-operate.


Our reward for all the hard work was a new dessert (on the premise that it's still cold enough to be eating hot puddings). It's based on a Bakewell tart, but without the pastry. So just a 'Bakewell', maybe.


Ingredients

150g/¾ cup sugar
150g/1½ cups ground almonds
4 eggs
75g/3oz butter
300g/10oz mixed summer fruit
60g/½ cup flaked almonds

Preheat the oven to 350°F/180°C. Melt the butter and mix it with the eggs, 100g/half a cup of the sugar and all of the ground almonds. Mix the summer fruits with the remaining sugar and put into the base of a glass dish. Pour the egg mixture over the top, then sprinkle with the flaked almonds. Bake for 40 minutes.

22 September 2012

Crumble tart

Mike and I made a bit of a lifestyle change in mid-August when we started following the 5:2 way of eating. This involves eating perfectly normally most of the week, but drastically cutting back calories on two days to 500 for me and 600 for him. It's been going pretty well and I've set up a separate blog about it, with recipes and so on, as it doesn't really fit into the theme of this one.


Today was a not-a-fasting day (hurrah) and I took advantage of it by making this delicious tart. The recipe is from Nigella Lawson's How to be a Domestic Goddess, where it's called German Plum Tart. In my version I used two slightly spongy apples (which were sitting neglected in the fruit bowl and destined to become compost if I didn't do something creative with them) and two peaches instead of the plums called for in the recipe.

The tart consists of three layers. The bottom one is a sweet yeasted dough which is pressed into the bottom of a roasting dish:


Then comes the layer of fruit with three tablespoons of brown sugar, which makes a sweet syrup with the juice from the peaches:


The final layer is a crumble of flour, sugar and butter (I didn't have the walnuts or pecans that the recipe called for). The syrup sinks into the dough and the crumble on top crisps up beautifully.

A perfect treat after a day of abstinence!

01 February 2012

Chickens, inside and out


We keep getting little tastes of winter, followed by warm spells. Yesterday there was an inch or two of snow on the ground in the morning, enough to keep the chickens indoors. It melted over the course of the day and by this morning the chickens were happy to scratch around in the soil of the orchard.

January was stressful in relation to the chickens, as they were being preyed upon by a nocturnal killer. We lost five hens over the course of ten days. Mike spent a lot of time hammering wire over any holes he could find in the chickens' corner of the barn. We think the killer was a stoat (or ermine, as they are known in their white winter coats), as they just drink the blood of their victims, rather than eat their flesh. All the dead birds had damage to their throats but were otherwise unharmed.

Since the carcasses were basically sound, I decided that I should use some of the meat. It seemed a waste to just dispose of the bodies. The hens range in age from one to three years old; they weren't going to suitable for roasting and I therefore decided not to go the whole plucking-and-gutting route. Instead, I removed the skin from their fronts and legs and cut the meat out. I write that very casually, but I felt very nervous and sad about it. I don't look upon the chickens as pets but cutting them up for meat wasn't something I had been planning to do.

The first thing I noticed about the meat was the colour of the fat around the legs: a really bright yellow, not at all like the fat you see on the meat of the young chickens which are normally offered for sale. The leg meat was also much darker, although the breast meat looked much the same. I'd never cooked meat from such a (relatively) old bird, so I spent a little while researching the best way of doing that.

Long, slow, cooking seemed to be the Internet's answer, along with letting the meat mature for a few days in the fridge before using it. I just added water to the chicken legs and cooked them for eight hours on my oven's slow-cooking setting (around 225°F/108°C). Afterwards, I chilled the meat so that I could take the layer of fat off. The meat was very good to eat and the resulting stock was great but I would still much rather have had the chickens alive and well and producing eggs.

It has been ten days now since we last found a dead hen, so we're hoping that the ermine has been foiled in its chicken-hunting enterprises.

30 May 2011

Ice-cream weather (finally!)

A neighbour gave me some spearmint for the garden, just after we moved here (nearly four years ago, now - doesn't seem possible!). It's been fairly well behaved until now, but this year it has lived up to its invasive reputation. I spent some time today pulling a fair proportion of it up. But it seemed a shame to throw it on the compost heap, and the summer weather has arrived at last, so I thought I'd use it to make mint choc chip ice cream.


I found a recipe online from the ever-reliable David Lebovitz (well, in ice-cream matters, anyway, I can't speak for his personal life). It called for 80 grams of mint leaves, which is pretty much exactly what I had pulled from the garden. You steep the mint with hot cream, milk and sugar for an hour, after which time it looks like this:


You can see how the milk is turning a pale greenish colour. After an hour of steeping you squeeze the mint leaves dry, extacting every possible drop of colour and flavour. What's left of the leaves makes a very compact ball!


The infused milk is then used to make a custard with eggs, in the usual way. Because our chickens' egg yolks are so orange, the resulting colour of the custard is more yellowy-green than you'd think of for mint ice cream. Chartreuse, even:


The mixture is then frozen in an ice-cream maker and melted dark chocolate stirred into it. By the time it's been churned, the green tinge has pretty much gone and it could be just vanilla. It hasn't lost the mintiness, though. Oh, no.


Now I've never really liked mint choc chip ice-cream. But this one, I feel differently about. It's really fresh: a perfect way to welcome summer.

10 April 2011

Snakes alive

It's warming up a bit, and all the snow has gone, at last. One sure sign of warmer weather is when we start to see garter snakes basking on the path and in the border at the front of the house. Yesterday there was a whole heap of them enjoying the sunshine just in front of our garage door:


I've never seen quite so many together at one time!

I got everyone working outside yesterday morning. Child#1 tidied up the front border, while Child#2, my mother-in-law and I worked together in a small production line, potting on the tomato plants. It was lovely and warm in the greenhouse. The plant labels are another good bit of recycling: the children have a bit of a lollipop/popsicle habit, so I keep the sticks, boil them to sterilise them and then re-use them as labels for the plants. They look better than plastic labels, I think, and are easy to write on (as long as they're dry) with a sharp pencil.

21 March 2011

Hot stuff

I'm going to be away for a couple of weeks, so I've had to compress a lot of garden-related jobs into the last two weekends. On Saturday we tackled the chicken coop, carting out ten wheelbarrow-loads of litter and giving the floor and perches a good scrape and clean. Mike chipped some cedar branches to replace the old litter and it now smells a lot more fragrant in there!

This is a twice-yearly job, September and March. I was a bit more scientific about it this time, making sure that each barrowful got a good soaking of water before adding the next one. It's much more difficult to get the pile properly wet if you add the water at the end (as I found in September).

By this morning (two days later), the temperature inside the heap was reading 54°C/129°F, which is in just about the right range for killing pathogens. The outside temperature was just 3°C/37°F when I took this reading. Yes, that is a cooking thermometer. And no, I don't use it in the kitchen any more. ;-)

The heap will be a bit stinky for a while, as it cooks and then cures. But it's nowhere near the house and I'll miss the worst of it, as I'll be away. I'm no fool...

19 September 2010

Just add water

Yesterday's not-so-fun job was emptying the chicken's stall of litter. There were about seven barrow-loads of it, which are now sitting outside the greenhouse, ready to be turned into chicken manure. Of course when you want it to rain, it doesn't, so I'll be watering this heap along with the greenhouse beds for the next week or so, to get the process going. Then once it's good and hot, I'll cover it with tarpaulin and let it rot down over the next few months.


When I look at this pile I'm planning how it's going to help improve my vegetable garden next year. I certainly hadn't thought about it as a source of food for anything other than my plants. But while doing a little research on how best to turn it into chicken manure I came across this disturbing article from last year about how cattle are being fed poultry litter to bulk out more expensive animal feed. This practice is illegal in Canada, but not in the US. How can anyone think that it's a good idea to feed faecal matter from one animal to another? Poor cows.

In case that has left a bad taste in your mouth, here are a couple of photos I took today of flowers and insects, to change the subject.


11 March 2010

Cooking...something else

Warm weather and the sight of seedlings in the greenhouse prompted me to get making some compost from the detritus in the chicken coop. The chickens are spending most of their time out in the orchard again now, which meant I could get into their corner of the barn this afternoon and remove a barrow-full of shavings and droppings from underneath their roosting area.

We obtained a rotating composter from a County scheme two years ago. I was never very satisfied with it as a means of turning kitchen waste into garden compost. This was my own fault, I think, for failing to supply it with enough moisture to do the job properly. My regular vertical plastic bins do a good job without needing any additional water, so I'd stopped using the rotating one. But it did occur to me recently that it might be a suitable container for turning the chicken waste into compost.

I transferred my barrow-load of material into the composter, adding a fair bit of water as I went. By the time I finished there was an unappetising chicken-poop-coloured drip emanating from the base of the unit, so I hope I've added the right amount.*


I did all this in the greenhouse, thinking this location will help the contents get to the required temperature to kill pathogens (130-150°F/55-65°C according to this article at Seattle Tilth). There is a ready supply of water in there, too, which will help me to keep it at the right level of saturation to encourage decomposition. The 'uncooked' compost mix looks like this:


The article from the Seattle Tilth site suggests that the proportions of brown to green material (i.e. shavings to manure) in the mix should be 1:2, 1:1 or 2:1. I have to admit that I did not carefully measure the proportions (shocking, I know), but I suspect that it is more like 2:1 or even 3:1. I hope that in a month or two it will be in a fit state to add to the garden.

*This is reminding me of one of my grandfather's jokes. Oh dear, can't resist sharing it.
Woman to butcher: "Do you keep dripping?"
Butcher: "No Madam, it's just the way I stand."

04 December 2009

Disaster recovery (again)

If you were reading this blog back in January, you'll perhaps remember that I resolved to eschew supermarket drink cartons and snacks for the children's school packed lunches and, instead, provide home-made sweet snacks for them. I even got around to posting some of the recipes on the blog, too.

In August, with the new school year fast approaching, I decided to make a huge batch of chocolate chip muffins, which I would then store in batches in the freezer for use later in the year. Luckily, we had occasion to test them before September: we found that they tasted revolting. I had forgotten to add sugar and the overriding flavour was one of baking powder. Not very nice.

For nearly four months I've had this pile of carefully-wrapped muffins in a corner of the freezer, silently mocking me for my incompetence. Every so often Mike would say "What are you going to do with those muffins?", which didn't help at all.


Today I broadcast my problem on Twitter and got some useful responses:
  • Crumble them and turn them into a steamed pudding
  • Use them as the base of a trifle/tiramisu (three votes for this)
  • Make them into something like a bread-and-butter pudding
  • Mix them with a tin of over-syruppy cherries and then add to vanilla ice-cream
I've got so many minging muffins that I think all of these options will be used over the coming months (and if you've got further suggestions, please share them). I started tonight with the bread-and-butter pudding idea. I found a recipe (by a blogger who'd had a similar cake-related disaster) for Twice Baked Chocolate Cake, which I adapted for use with the muffins. I used just milk, rather than cream and milk and I obviously didn't leave out the sugar, as the blogger (Linda) suggests (not this time, anyway). I left the sugary custard mixture to soak into the muffin pieces for an hour so that they would suck up the sweetness and (I hoped) become edible again. The finished product wouldn't win any prizes in a 'most beautiful dessert' show, but it smelt wonderful. The original muffins, on the other hand, looked delicious, which goes to prove what I've always felt about food - looks aren't everything (or even anything).


I didn't tell the children what was in the dessert until they had both declared it "delicious". It was, too. It only used five muffins out of the sixty, so we will definitely be eating this again. Will have to try the trifle/tiramisu plan next...

29 November 2009

A mouse ate my Christmas tree

The festive season is all about traditions, old and new. Becoming a parent means that you get to create customs for your new family and I went about this quite consciously when we had our first child. One thing I bought was a re-usable cloth Advent calendar in the form of a Christmas tree, which I thought would make a good leading-up-to-Christmas tradition for us to have, many years into the future.

This is how the calendar looked at Christmas 2005. You can see that there are small cloth decorations for each of the days before Christmas.


We've used it for ten years now and it is as popular with the children as I'd hoped it would be. I was consequently horrified this morning to find that it had been well and truly nibbled by a mouse. The middle section of the tree was ruined and the lower part of the numbered pouches that hold the ornaments had been badly damaged, with the figures 22 and 23 missing.


Now needlework is not something I can claim to be any good at. My mum had to invent a dentist's appointment for me when I was fourteen so that I could avoid the last dressmaking lesson of the year. I'd managed to completely ruin the blouse I was supposed to be making and couldn't face admitting it in front of the rest of the class. I've never enjoyed sewing since, so the prospect of making good this ruined tree did not appeal.

Luckily the ornaments were in fairly good shape, although the Noel heart at the bottom of this photo had been chewed upon and one of the others, a striped candy cane, had disappeared completely. Spookily, the candy cane was one of only two ornaments that represented something edible. This mouse was clearly smarter than the average rodent.


I was loth to throw the whole thing away and it did look as though it might be salvageable. There's me trying to lead a more self-sufficient and sustainable lifestyle, I thought. I should be able to do this, just on principle!

I cut the damaged middle section of the tree out and re-sewed the top to the lower half. It makes the tree look slightly squat, but at least it's in one piece again. The lower part was more tricky, as first I had to patch it with green cotton (taken from the back of the removed middle section) and then create a new red part for the pouches. Child #2 had an old red t-shirt of roughly the right colour, so I used that. I knew that I'd never get the numbers to look right, as I didn't have any white embroidery thread, so I used plain white cotton and they now look decidedly rustic:


At least it's now usable again. I just have to find a replacement for the stolen candy cane. I even managed to mend my broken heart:


I'm hoping that my amateurish repairs will become a new part of this particular Christmas tradition: "Do you remember the year when a mouse ate our Christmas tree?".

POSTSCRIPT: The morning after I wrote this I had an idea for a replacement for the candy cane ornament. Using the old red t-shirt again, half a tissue, a piece of velcro from an old pair of my son's shorts and a piece of ribbon from my (sparsely equipped) sewing box I came up with this:


27 June 2009

"Soil is death"

Heard a brief but inspirational interview on CBC Radio's Definitely Not the Opera this afternoon. The whole programme was about waiting and it ended with a woman called Catherine Richard (not sure of the spelling), who is terminally ill with ovarian cancer: waiting to die. She has completely reassessed how she wants to spend her remaining time and when the weather is good, she chooses to spend her time gardening. In her words:
Well, when you think about it, soil is death. It is decomposed life and out of that decomposed life comes food and beauty and all the things that we rely on for living. So you can't be a gardener and be afraid to die because you know that everything just gets recycled through the soil.
The whole podcast is available for download and this segment starts at around 53 minutes into the programme.

27 March 2009

Filling raised beds

In wet weather, the greenhouse raised beds sit in a puddle of water. To make sure that drainage in the beds wouldn't be a problem I thought it might be a good idea to put sand in the bottom of them. We still had a fairly large heap of sand left behind after the channel from the barn to the house was dug for the backup-power supply, so we didn't need to buy any. Thinking of the way you are supposed to put crocks into containers, I also decided to recycle the large pile of stones that I extracted from the vegetable garden in our first summer here. The pile didn't look that big, but became six (very heavy) barrow-loads.

After tipping in the stones and three tractor-loads of sand the beds had about an inch of material in the base:

Mike has been digging another channel for the stream on the western side of the property, which has given us some topsoil. Here he is with the front-loader of the tractor full of soil for the first bed:

I don't think he had enough opportunity to make mud-pies as a child. Here's a close-up of the contents:

After tipping in six loads, the first bed is now about half-full. The tractor had churned up the path so much that making any more trips seemed unwise today. We've left everything to dry out a bit before doing a bit more, perhaps tomorrow.

While I was away the spinach, lettuce and leeks I sowed in the greenhouse have germinated, but the peas I carefully sowed in the gutters seem to have vanished altogether. Hm, mice maybe? Will have to re-think and re-sow those.

Indoors I've sown peppers and aubergine seeds into trays in the electric propagator. I wasn't too impressed with the Hungarian Hot Wax chilli peppers last year, so this time I've gone for Cayenne and Tomato peppers. I'm also trying again with the Corno di Toro Rosso sweet peppers, despite a lack of any peppers managing to reach maturity last year. I'm hoping that a slightly drier summer and a better location in the garden (one that won't get waterlogged) will do the trick.

08 March 2009

Brief glimpse of Spring

Hung the washing on the line for the first time this year and then spent a couple of hours this afternoon in the garden and greenhouse. I cleared up the remains of the cabbages that I had failed to harvest before the frosts arrived last year. I also sowed some more lettuce and some leek and spinach seeds into trays in the greenhouse. Mike added a few more scoopfuls of sand to the wettest of the beds in the lower vegetable garden, which I raked into the soil. Or into small ponds, in some cases. Mike also dug another channel to divert some of the stream water away from the barn, which might help to dry the barnyard up a bit more quickly.

I've read about using guttering (eavestrough) to start off peas, so thought I'd have a go at that. In fact the gardener Sarah Raven recommends this for a variety of different vegetables in an article I found online just now. Including parsnips, which might be worth a go. I've never tried doing this before, but as our soil is so cold and damp at the moment (and as I now have a greenhouse to shelter them in!), I thought it was worth a try.

The only time I've seen people doing this, they've been using the semi-circular sort of plastic guttering that you get in the UK. All I had to hand was some old alumin(i)um eavestrough that must have fallen off the side of the small barn at some point. It's square rather than semi-circular, but I'm assuming that it will work just fine. It was quite long, so I got Mike to cut it into two pieces for me, then filled it with potting soil/compost. I've sown Oregon Sugar Snap II in the smaller length and Lincoln peas in the longer one.

Tonight we've got freezing rain forecast, so the fleeting look at Spring won't last long, but it was enough to fill me with enthusiasm for the growing year ahead. Yesterday was so hectic with the book launch we held at the library in Deseronto, that it was lovely today to reconnect with the garden. I'm even pleased to see that my fingernails have regained their trademark growing-season line of muck!